Integrate with Strapi
Strapi is an open source content management system that allows you to define your own schemas for your content.
In this guide:
1
Install the Mux Video Uploader plugin
Install the Mux Video Uploader plugin
2
Create access token in Mux
Create access token in Mux
3
Configure Webhook listener
Configure Webhook listener
4
Setup configuration in Strapi
Setup configuration in Strapi
5
Upload video
Upload video
6
Explore advanced options
Explore advanced options
Release Notes
Release Notes
The Mux Video Uploader plugin allows editors to upload content directly to Mux from within the Strapi interface, then associate those videos with their custom collection types.
Requirements
- A working installation of Strapi that is publicly accessible through a hostname
- An Access Token and Secret Key which is provisioned within Mux Dashboard
- Configure a Webhooks listener within Mux Dashboard so that Strapi can be informed of upload progress.
1Install the Mux Video Uploader plugin
With your existing Strapi installation, run the following command in the root of your Strapi project to install the plugin. Be sure to restart Strapi for the plugin to take effect.
Version notice
As of the 2.1.0 version of this player, only Strapi v4 will be supported. To use with Strapi v3, please use version 2.0.0 of this plugin.
Install instructions for Strapi v4
Run this command in your project folder if you are using NPM:
npm i strapi-plugin-mux-video-uploader@latestOr this command if you are using yarn with your project:
yarn add strapi-plugin-mux-video-uploader@latestInstall instructions for Strapi v3
Run this command in your project folder if you are using NPM:
npm i strapi-plugin-mux-video-uploader@2.0.0Or this command if you are using yarn with your project:
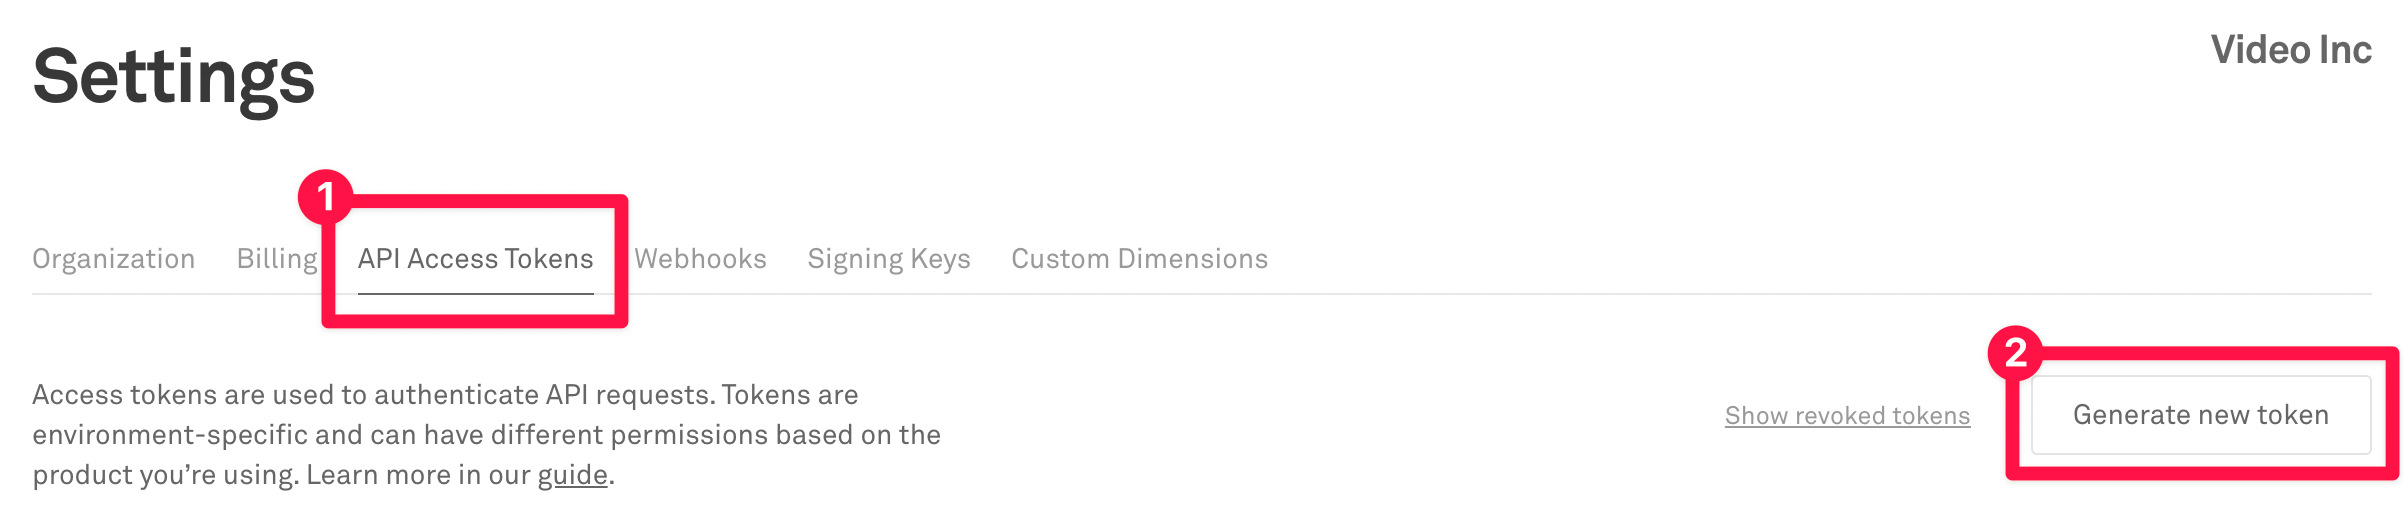
yarn add strapi-plugin-mux-video-uploader@2.0.02Create access token in Mux
Generate a new Access Token by going to the Access Token settings of your Mux account dashboard.
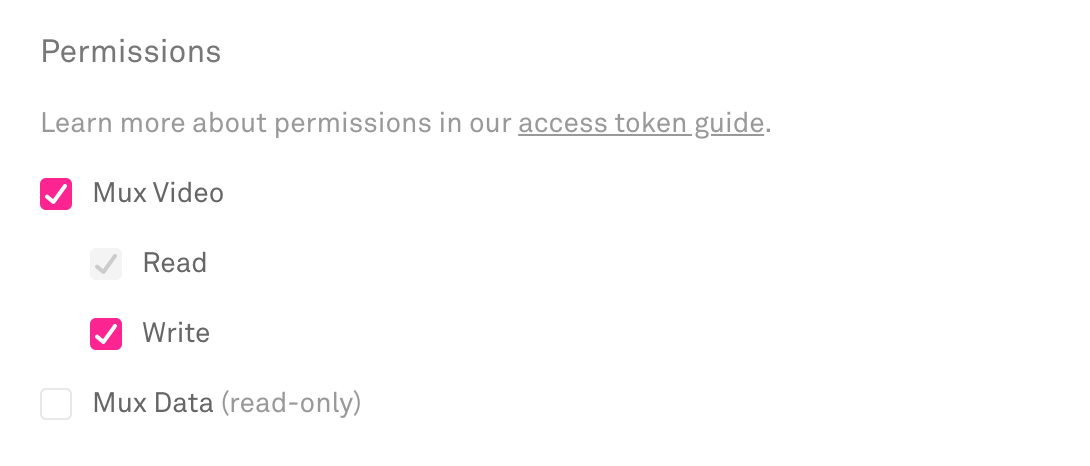
The access token should have Mux Video Read and Write permissions.
After clicking the "Generate Token" button, save the "Access Token ID" and "Secret Key" to be used later.
3Configure Webhook listener
Part of the upload process includes Mux updating Strapi with the completion of the upload and processing. In order for Mux to make this communication, a Webhook needs to be established so that events are sent to your Strapi installation.
Create a new Webhook configuration in Mux Dashboard. There will be a space to add a "URL to notify". This value should be formatted based on your Strapi's hostname
{YOUR_STRAPI_DOMAIN_HERE}/mux-video-uploader/webhook-handlerAfter saving, copy the "Signing Secret" which will be used later.
4Setup configuration in Strapi
In Strapi, visit the Settings page and navigate to the MUX VIDEO UPLOADER section.
Using the details saved in the previous step, fill in the fields with the appropriate values.
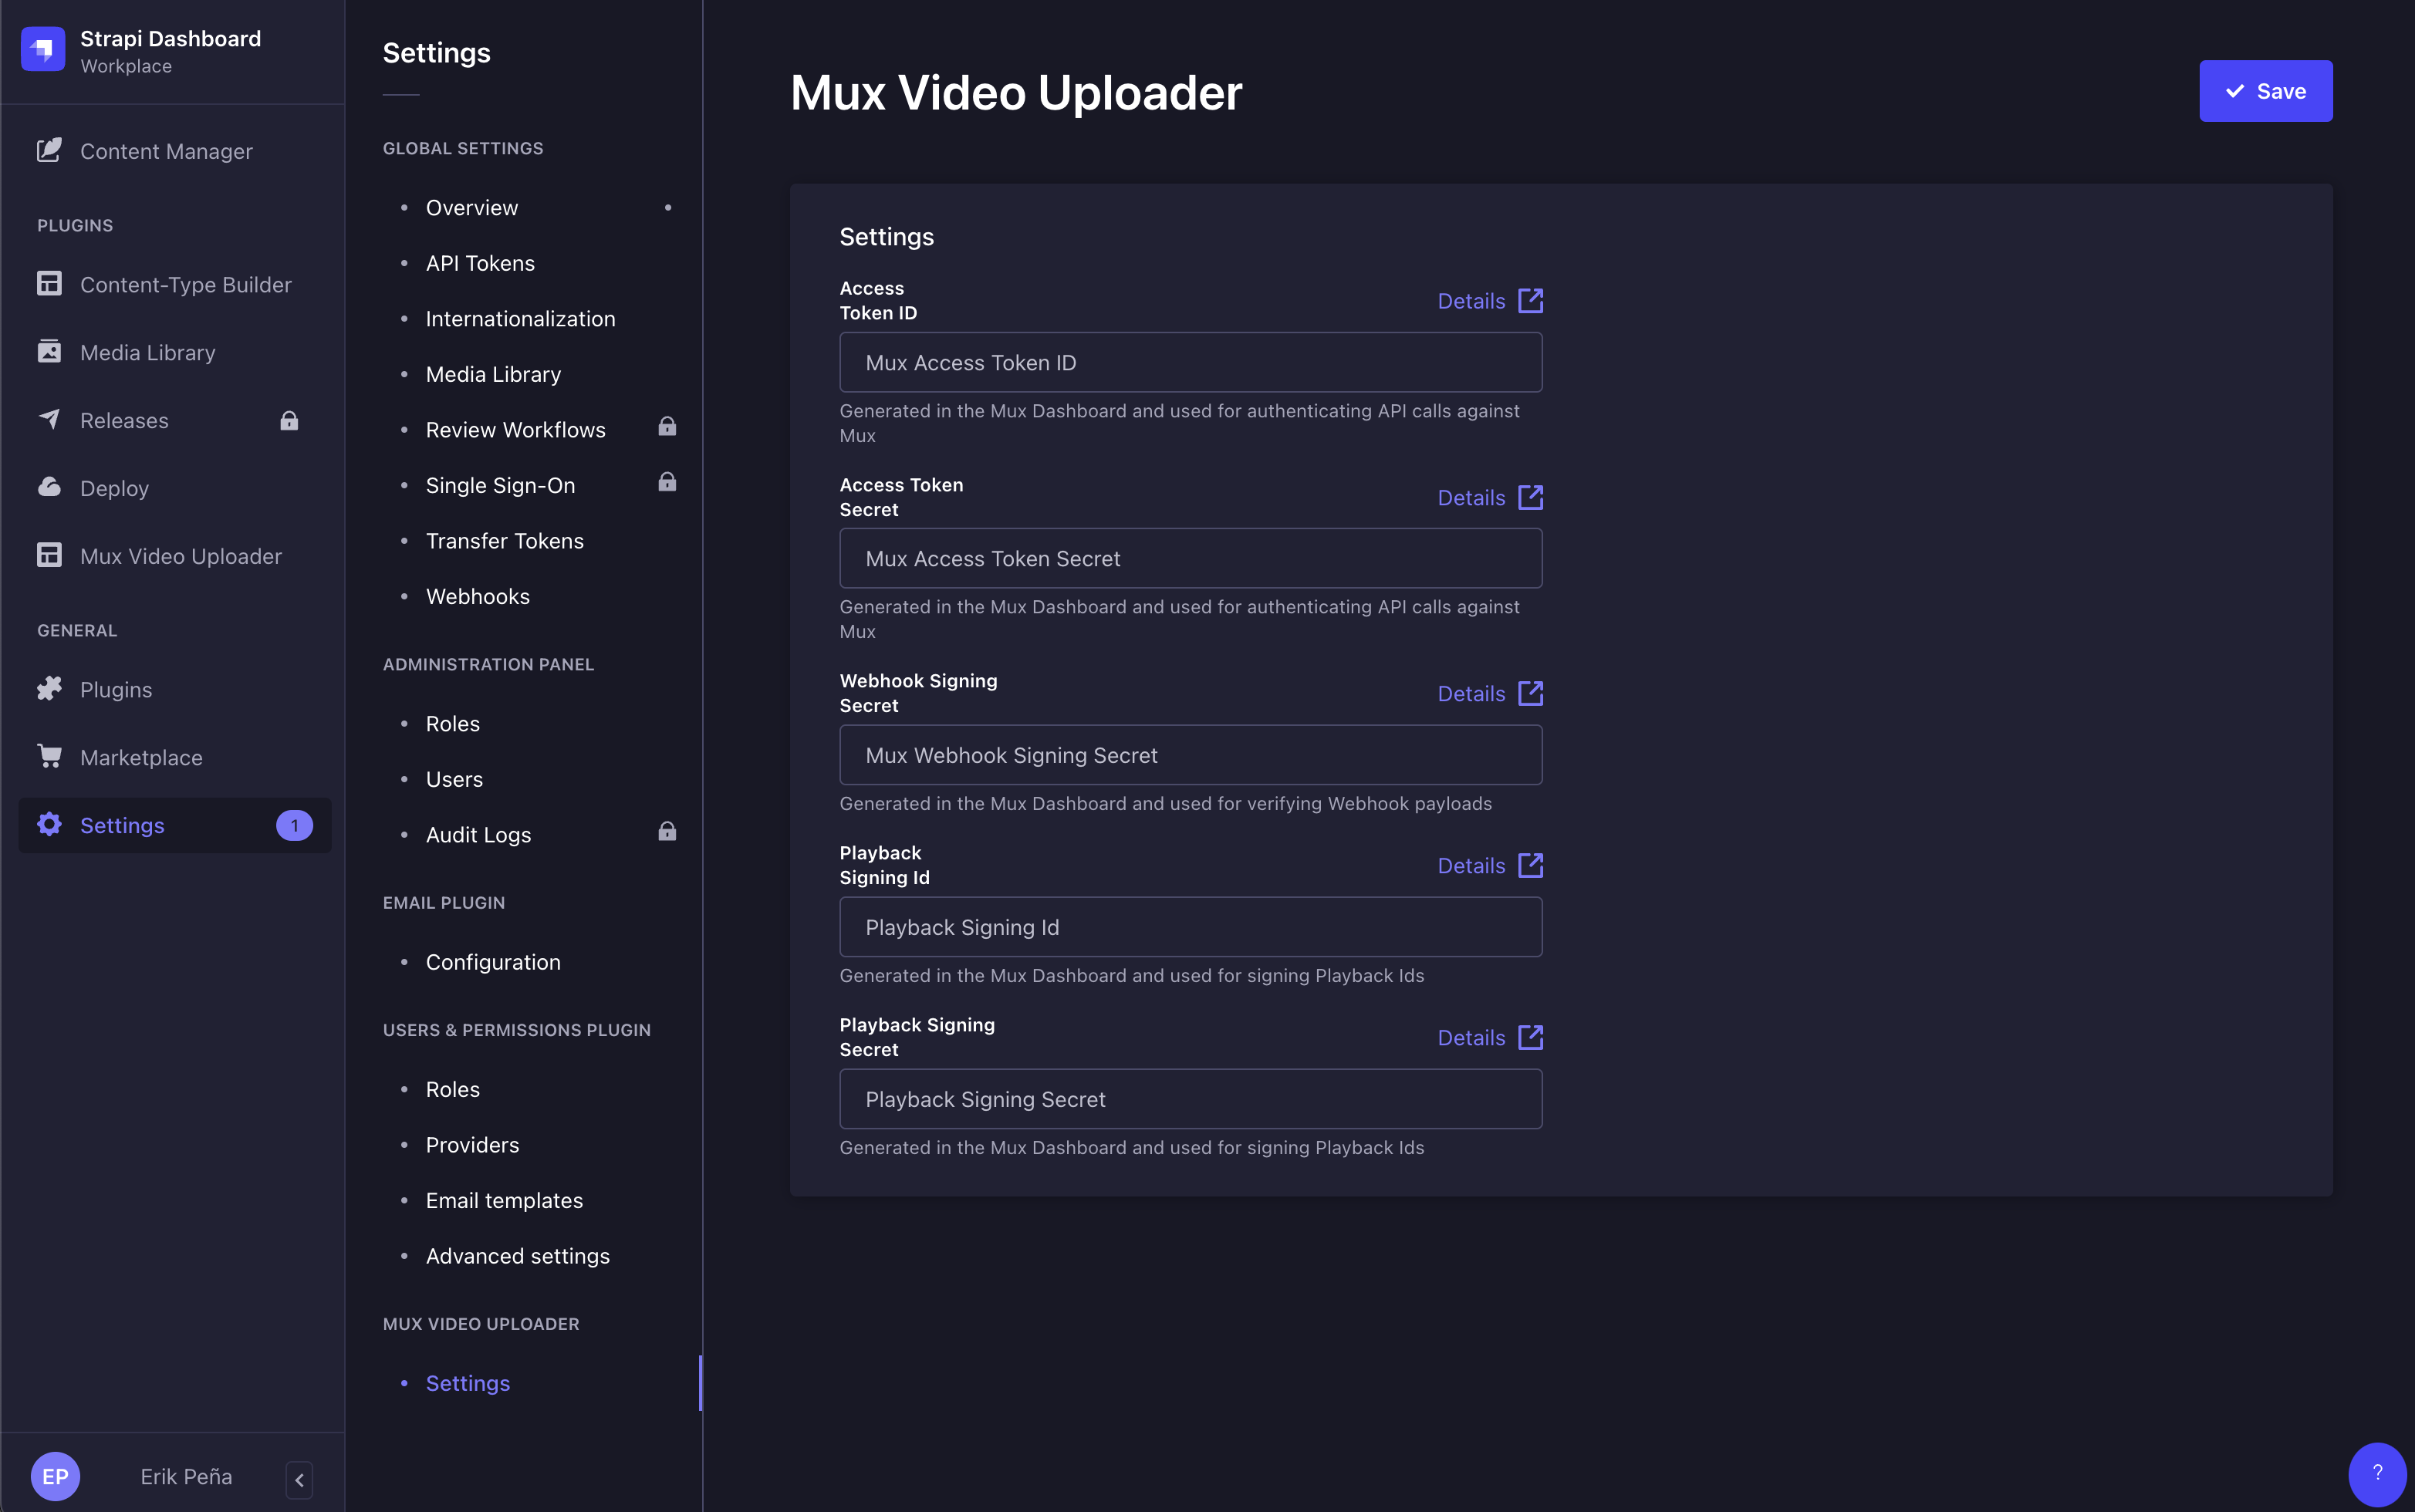
Click the "Save" button to persist the changes.
5Upload video
Use the Mux Video Uploader page that is now available in Strapi's menu to upload either with a remote URL or directly using a local video file.
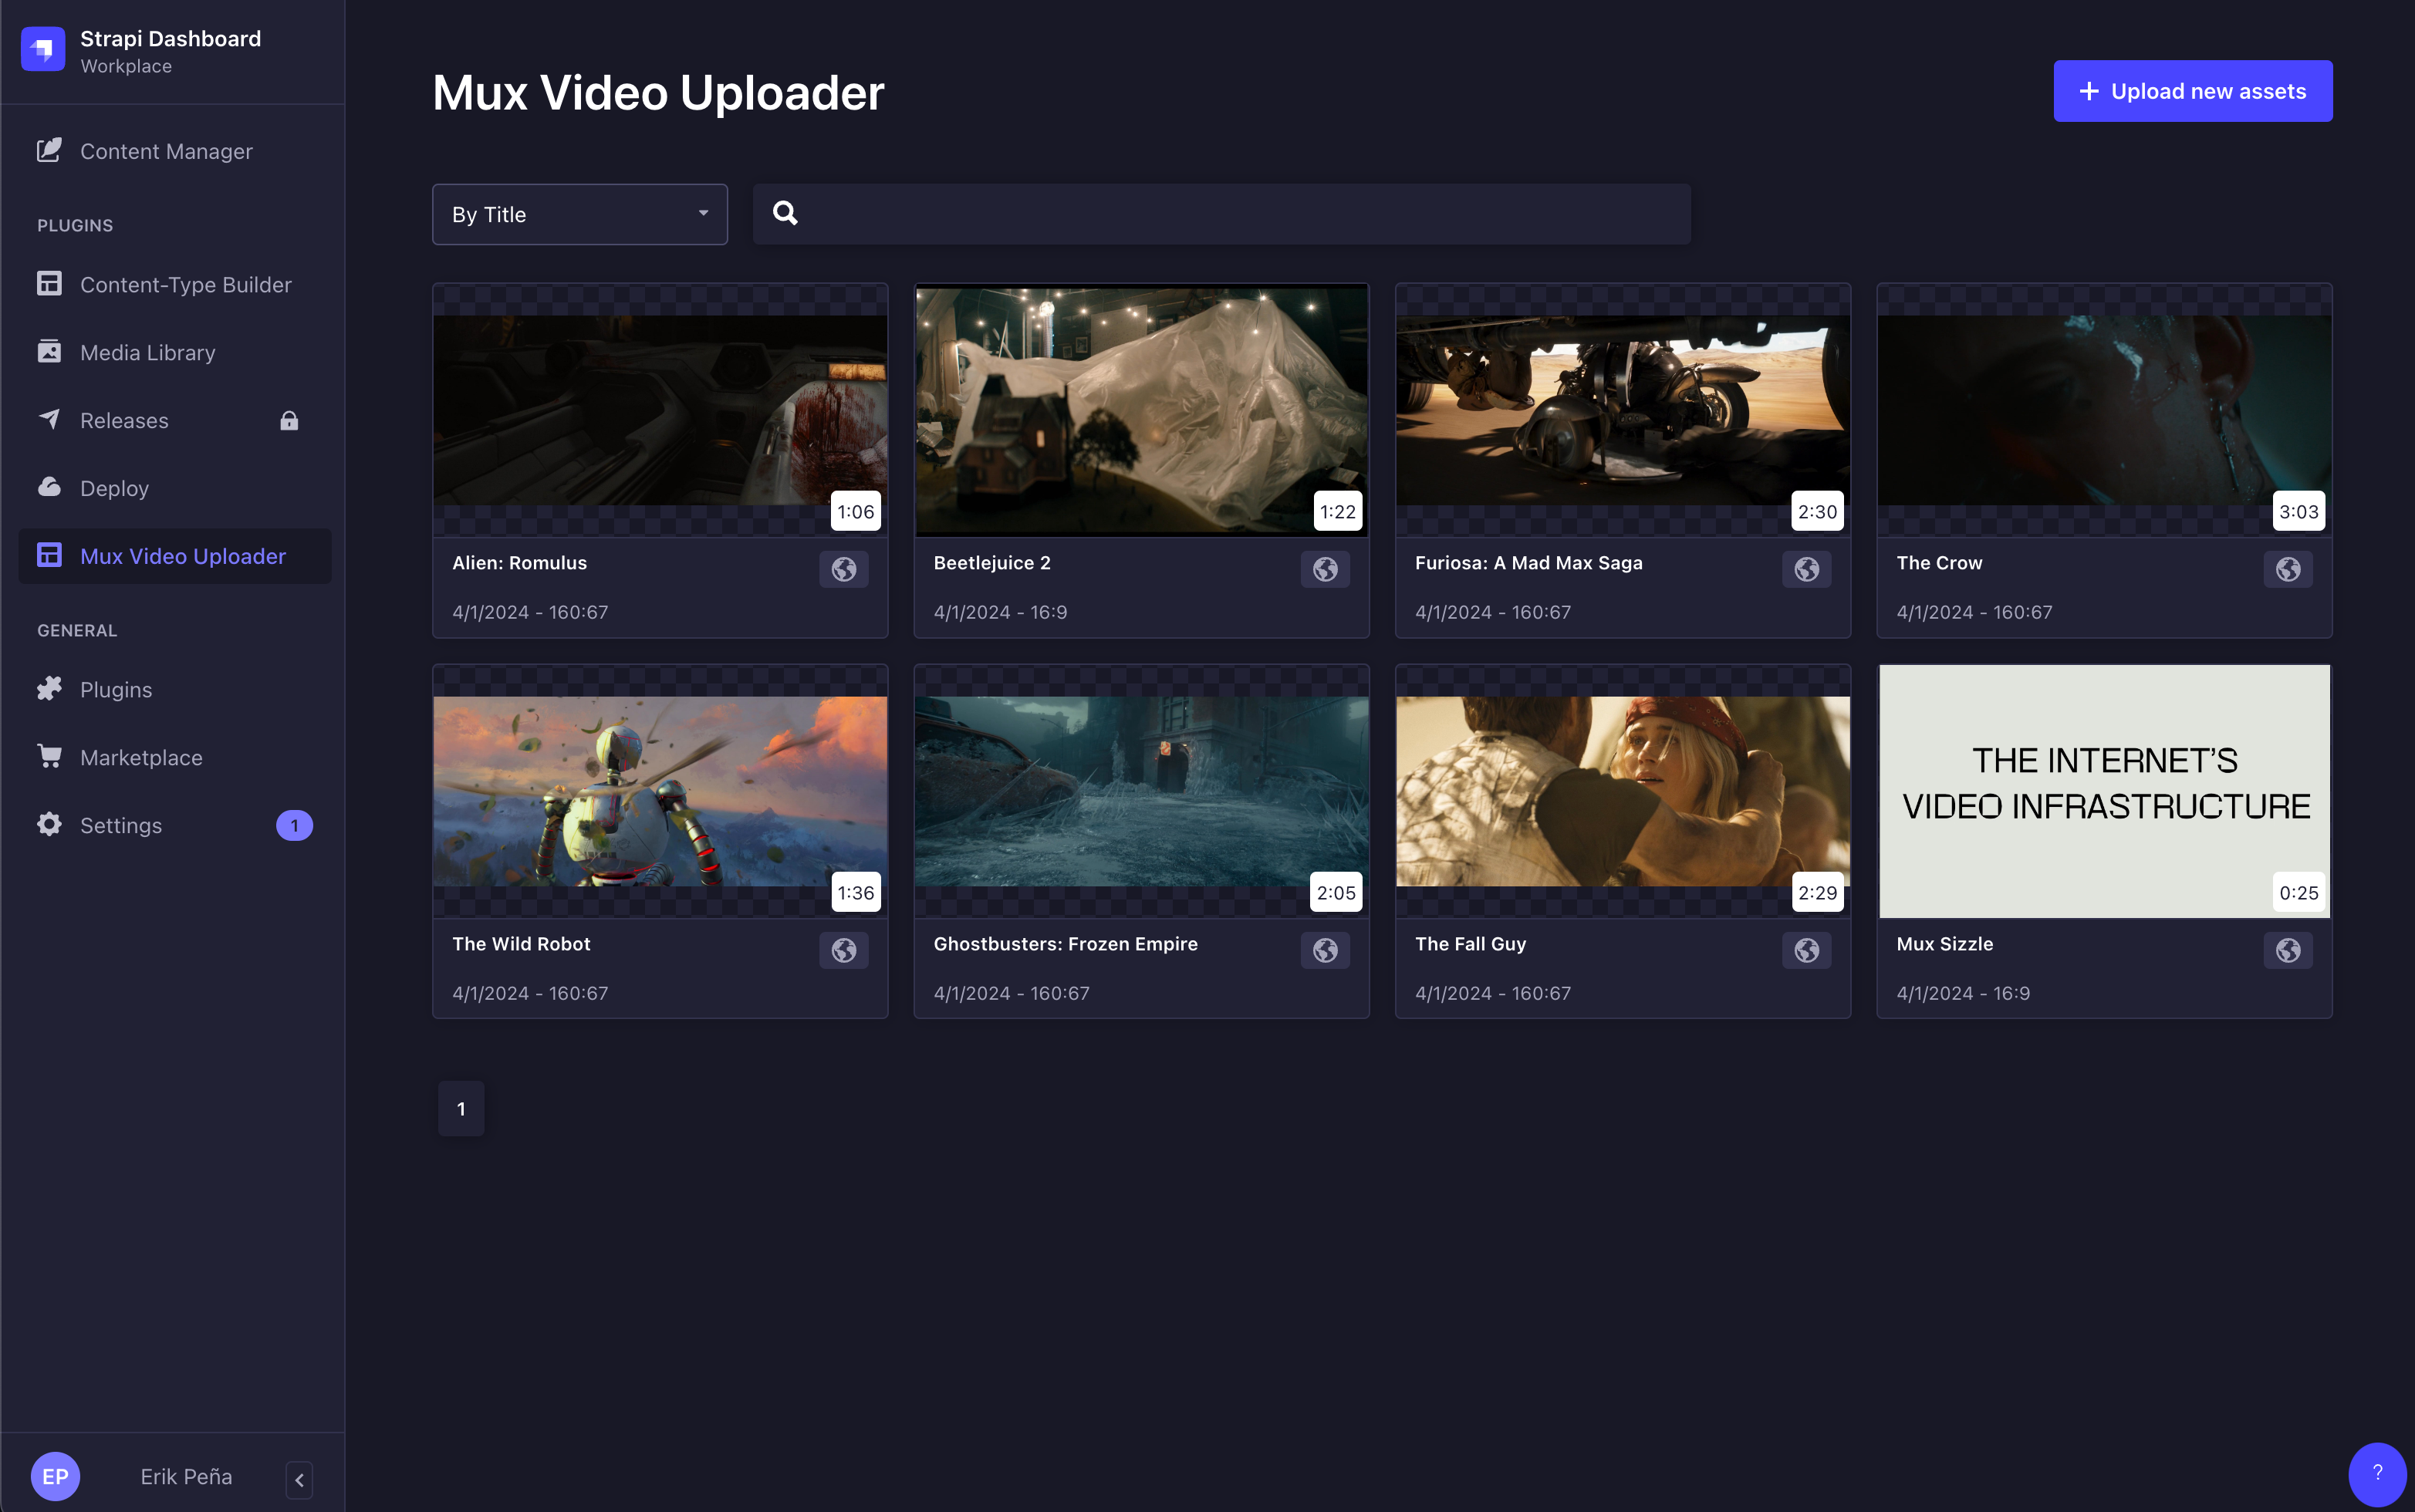
From here, relationships of Mux assets can be modeled to custom collection types within Strapi to tie metadata with playable content.
Congratulations!
You now have the ability to upload content to Mux through Strapi CMS!
At this point, querying Strapi using REST or GraphQL will give you access to the playback_id information. This playback_id can be used by your client applications to stream content or retrieve thumbnails.
6Explore advanced options
Signed tokens
Warning! Requires generating JWT on your server
Enabling signed URLs in Strapi will require you to generate your own signing tokens on your application server. This involves creating a signing key and using that to generate JSON web tokens when you want to access your videos and thumbnails outside of Strapi.
By default, all assets uploaded to Mux through Strapi will be created with a playback policy of "public". This means that your videos and thumbnails are accessible with https://stream.mux.com/{PLAYBACK_ID}.m3u8 and https://image.mux.com/{PLAYBACK_ID}/thumbnail.jpg.
If you want more control over delivery of the playback and thumbnail access, you can enable this feature in the Strapi settings for the Mux Video Uploader.
When you enable this feature, the following things will happen:
- The Mux Plugin in Strapi will save the signing keys that you've generated and be available immediately.
- Any Assets that get created with the Signed Playback URL setting enabled will be created with
playback_policy: "signed"(instead of"public"). - The signing key from Step 1 will be used by the Mux Plugin to preview content inside the Strapi UI.
- When you access your content in your own application, use the
MuxAsset.signedproperty to determine if the asset is signed by either atrueorfalsevalue.
{ "id": 9, "upload_id": null, "asset_id": "H9H01yni83yRLuu6cKaf8jQI8XW01SPp5XI7WrGsD37n00", "playback_id": "aAqXNee00zlfzR2Rsw01NmGBvxSg1Ocs3g008YChvtG6aM", "signed": true, "isReady": true, "duration": 25.492133, "aspect_ratio": "16:9", "createdAt": "2024-04-01T23:48:19.760Z", "updatedAt": "2024-04-01T23:48:21.605Z"}- You should use the signed
playback_idto create URLs for playback and for thumbnail generation.
- Playback
https://stream.mux.com/{SIGNED_PLAYBACK_ID}.m3u8?token={TOKEN} - Thumbnails
https://image.mux.com/{SIGNED_PLAYBACK_ID}/thumbnail.jpg?token={TOKEN}
- The
TOKENparameter for the above URLs is something you create on your server according to Step 2 in Secure video playback
Note that in the Strapi UI when an asset is using a signed URL you will see a lock icon on the Asset list.
Encoding Tiers
When uploading a new video, you can select what Encoding Tier used when preparing the Asset. Possible selections are Smart and Baseline. When choosing Smart additional options are made available for maximum stream resolutions (1080p, 2K or 4K).
More details can be found in our Use Encoding Tiers section.
Static Renditions
When using the Smart Encoding Tier, an option to enable downloadable MP4s will be available. This option will create Static Renditions for the Asset and will make MP4 files available for download to client devices using a formatted URL.
Captions/Subtitles
With Mux's auto-generated captions, editors can easily add captions to videos being uploaded from Strapi. When using the "Auto-generated" option, Mux will generate captions automatically while it prepares the Asset. More details can be found in the Add auto-generated captions to your videos and use transcripts section of our documentation.
If you choose to upload a "Custom" captions file (supported formats are .vtt and .srt), your file will be uploaded to your instance of Strapi and Mux will pull it via a public URL from your Strapi instance. Take a look at our Add subtitles/captions to videos for more details.
Set up playback
Preview your video content
Integrate Mux Data
Release Notes
Current release
v2.8.0
- Added the ability to specify encoding tier setting on new uploads.
- Added the ability to specify static renditions when uploading a Baseline encoding tier Asset.
- Added the ability to auto-generate captions or manually upload a captions for an Asset.