Core functionality of Mux Player
In this guide, see the features and functionality that Mux Player gives you out of the box.
In this guide:
Mux Platform integration
Mux Video integration
Mux Player is built for playing assets hosted with Mux Video. Features like timeline hover previews and automatically pulling poster images work with minimal configuration because the video is hosted by Mux.
Mux Player will use the optimal HLS.js settings based on the type of stream being played, on-demand or live. New versions of Mux Player will contain upgraded versions of HLS.js that are known to be stable versions and tested with Mux Player.
Mux Data integration
Mux Player is integrated with Mux Data automatically to measure the performance and quality of experience. See the Understand metric definitions guide to learn more about the metrics that are tracked with Mux Data.
Your Mux Data environment will be inferred from the playback ID provided to Mux Player. No configuration is necessary. If you would like to override that default and send the video views to a specific Mux environment, you can pass the env-key (HTML element) attribute or envKey (React) prop.
Responsiveness
Mux Player has different UI permutations based on stream type (on-demand or live), feature support (like Airplay), and player size.
Note that the responsiveness of Mux Player is based on the size of the container that it is being rendered in, not the viewport size. If you have a collection of small players in a large viewport, the layout of the controls for each player will be sized appropriately.
Here is a CodeSandbox environment you can view samples in
Controls and UI
Mux Player will show or hide controls based on availability.
On iPhone browsers Mux Player uses Apple's fullscreen functionality.
On iPhone and iPad browsers, the volume slider is not present. Volume level must be controlled via the hardware buttons. This is a restrictions of iOS and iPadOS.
The fullscreen button will not show if fullscreen functionality is not available on the page. For example, if Mux Player is embedded inside of an iframe that does not include the allow="fullscreen" attribute. This is currently the case on CodeSandbox examples and other similar code testing platforms.
If you are embedding Mux Player in an iframe, use the <iframe allow="fullscreen"> in order to access fullscreen functionality.
You'll notice the controls are different for on-demand and live stream types.
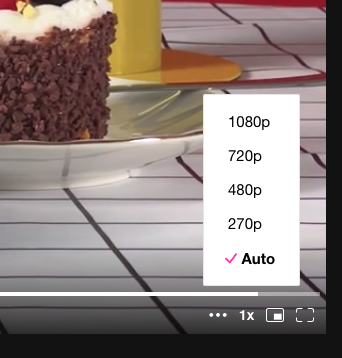
Quality selector
By default Mux Player will show a quality selector in the control bar. This is not strictly necessary, the player will use an adaptive bitrate algorithm to determine the highest quality that can be streamed smoothly. However, in some scenarios users may want to pin to a higher rendition for text legibility or because they simply have a preference for viewing the higher quality resolution than what the adaptive bitrate algorithm determines. In these scenarios it's important to understand that there is a tradeoff. If the user is selecting a higher rendition than what the player would naturally use, they will likely experience rebuffering because the available bandwidth is lower than the quality they want to view. That is perfectly okay, but they have to be willing to make that tradeoff.
Caveats with quality selector
There's some details to understand about when the quality selector will be available depending on the device, operating system and browser. The quality selector is only available in environments that use Media Source Extensions (a.k.a. MSE) to power the streaming.
For Mux Player, that means:
- The quality selector is available in all non-Safari desktop browsers because Mux Player uses MSE in these browsers
- The quality selector is available on Android, because Mux Player uses MSE in Android browsers.
- The quality selector is not available by default on MacOS Safari and any iPadOS browser because Mux Player uses Apple's internal HLS playback engine on these platforms. However, MSE is supported on these platforms so the quality selector can be enabled by forcing MSE with the attribute
playback-engine="mse"(web component) orplaybackEngine="mse"(React). See more here about changing the default playback engine. - The quality selector is not available and cannot be enabled on any iOS browsers because MSE is not supported on iOS (instead iOS requires that HLS playback is done via Apple's internal HLS playback engine, which we do not have programatic access to)
If you prefer to hide the quality selector all together, you can do that with the CSS variable which sets the display property on the control:
mux-player { --rendition-selectmenu: none;}See more about styling with CSS in the Customize look and feel guide
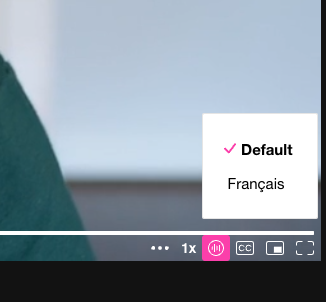
Multi-track audio selector
By default, if your stream has multiple audio tracks (e.g. descriptive audio, dubs for another language, etc.), Mux Player will show an audio track selector in the control bar. If there is only one or no audio track, the control will be automatically hidden.
If you prefer to hide the audio track selector all together, you can do that with the CSS variable which sets the display property on the control:
mux-player { --audio-track-selectmenu: none;}For more details on how to use multi-track audio, including adding it via Mux Video, check out our blogpost.
Chromecast
Chromecast support is built-in.
- For Mux player >= v2.3.0 no additional configuration is needed.
- For Mux player < v2.3.0 the only thing you need to do in order to enable it is add the Google Cast script to the
<head>of your webpage.
<script defer src="https://www.gstatic.com/cv/js/sender/v1/cast_sender.js?loadCastFramework=1"></script>When this script is loaded and a Chromecast is detected on the network then Mux Player will show the Chromecast button in the control bar.
Note that the default Chromecast receiver app does not currently support low-latency Live Streams. If you have your own receiver app that you want to use instead of the default Chromecast receiver app you can over-ride the variable: chrome.cast.media.DEFAULT_MEDIA_RECEIVER_APP_ID to point to your receiver app ID.
Live Stream playback
When live streaming with Mux you have 2 options for viewers:
- Non-DVR mode: This is most common. Use the
playback_idassociated with the Live Stream for playback. Non-DVR mode keeps viewers on the "live edge" of the live content and does not allow them to seek backwards while the stream is live. - DVR mode: This is less common, but might be what you want depending on the use case. Use the
playback_idassociated with the Asset that corresponds to the Live Stream for playback. DVR mode allows users to seek backwards while the stream is still live.
For more information about non-DVR mode and DVR mode and some of the tradeoffs to consider, take a look at this guide.
When viewing live streams with Mux Player you have 2 options:
- Use the
playback_idassociated with the Live Stream itself. - Live Streams created in Mux have a corresponding Asset. Use the
playback_idassociated with the Asset in order to view the live stream in DVR-mode.
When using DVR-mode in Mux Player, the UI will show a timeline for users to scroll back to the beginning of the Live Stream while the Live Stream is still active.
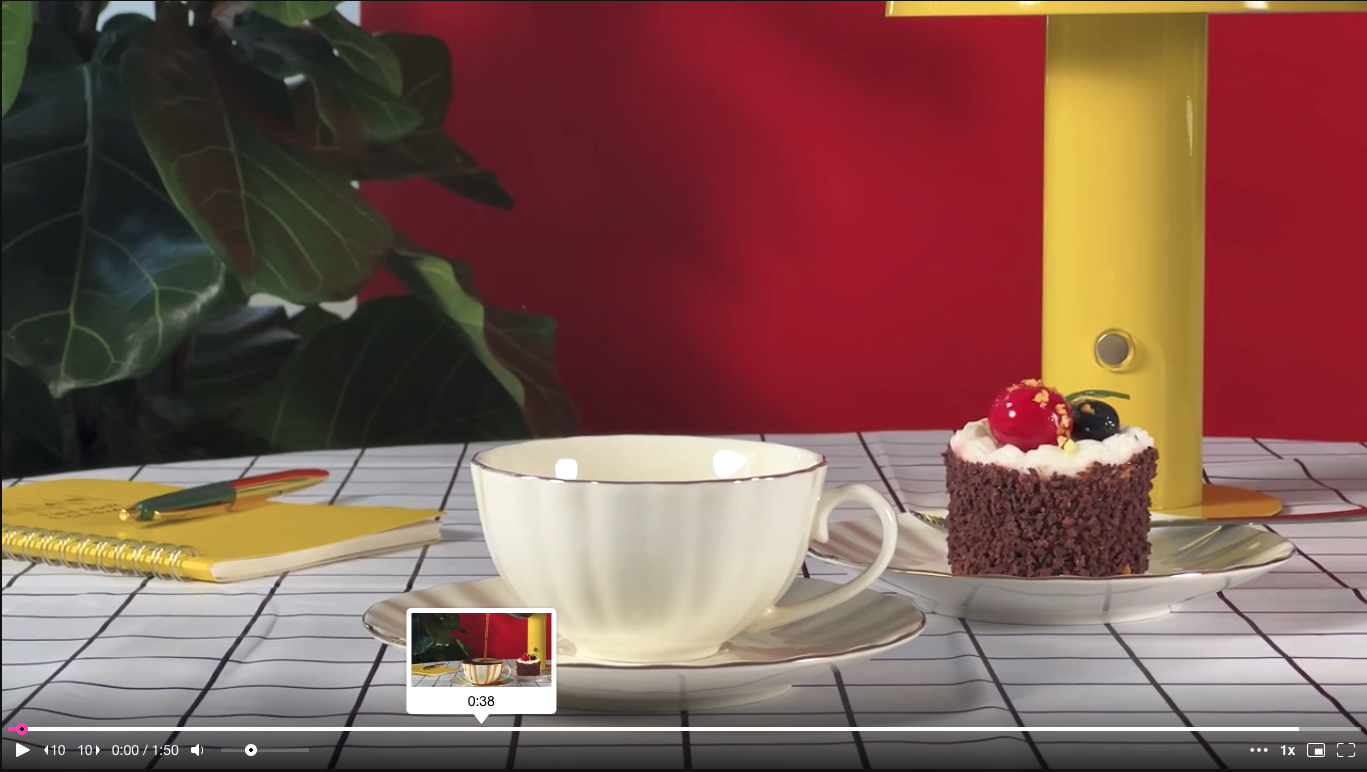
Timeline hover previews
Timeline hover previews show a small thumbnail of the video content at a given timestamp. They help to provide a contextual visual for the viewer based on where their cursor is positioned over the timeline.
When you play back a video hosted on Mux using Mux Player, you’ll see built-in timeline hover previews for the video with no extra work on your end.
Accessibility
Mux Player has taken steps to being fully WCAG AA compliant. At this time Mux Player supports:
- Keyboard navigation
- Screen reader compatibility with the Accessibility Object Model
- Closed captions / subtitles will show by default (if the video has them)
Best practices
Make sure to take accessibility into consideration when customizing Mux Player. See the guide for customizing the look and feel of Mux Player to change things like primary color, secondary color, or styling with CSS.
When setting color variables and changing styles make sure your implementation meets the contrast ratio requirements for WCAG 2.1.
Error handling
Mux Player will internally make every attempt to recover from errors and maintain smooth playback.
When Mux Player encounters unrecoverable fatal errors, it will try to:
- Make it clear to the viewer where the error is coming from and what, if anything, they can do about it.
- Provide context for a developer to debug and prevent the error from happening in the future. Developer logs prefixed with
[mux-player]will contain debugging details and a link to more information. - The error will be tracked with details in your Mux Data dashboard.
Audio player
If you have an audio-only Mux asset, you can set the audio attribute on mux-player to display the audio player. You can also add the audio attribute to a video asset to make a video look like an audio player.