Integrate with Sanity
Learn how to integrate Mux video with your Sanity studio. If your team is using Sanity as a CMS this integration will allow them to upload videos to Mux without leaving the Sanity studio.
1. Install Mux plugin
Run this command in your Sanity project folder:
npm i sanity-plugin-mux-input2. Use in a schema
Make a schema type and use mux.video for the type.
{
  "title": "Video blog post",
  "name": "videoBlogPost",
  "type": "document",
  "fields": [
    { "title": "Title", "name": "title", "type": "string" },
    {
      "title": "Video file",
      "name": "video",
      "type": "mux.video"
    }
  ]
}
You also need to import the Mux plugin and include it in your plugin list.
import { defineConfig } from 'sanity';
import { muxInput } from 'sanity-plugin-mux-input';

export default defineConfig({
  plugins: [muxInput()],
});
3. Enter Mux credentials
Generate a new Access Token by going to the Access Token settings of your Mux account dashboard.
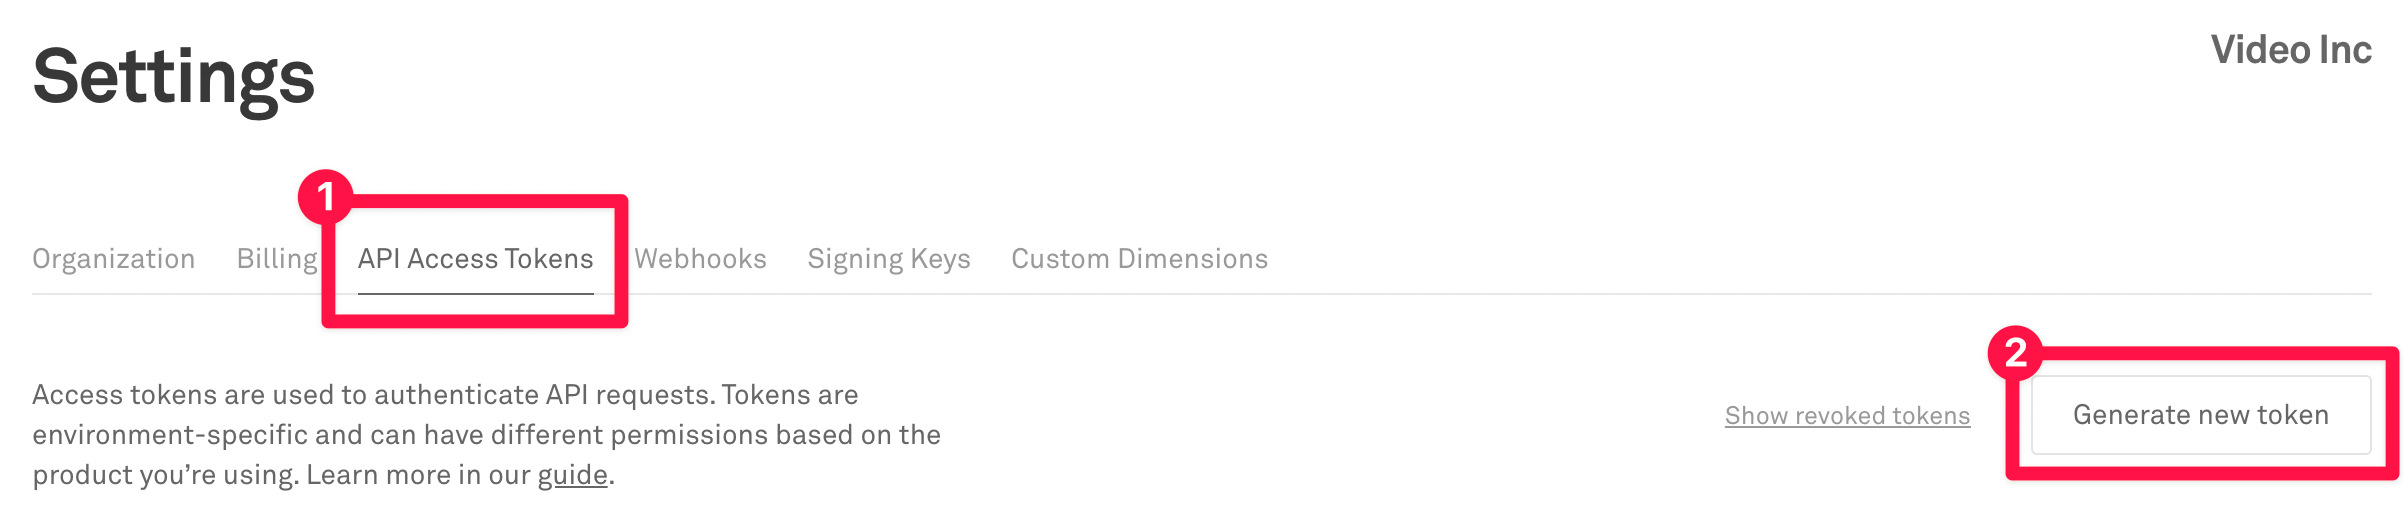
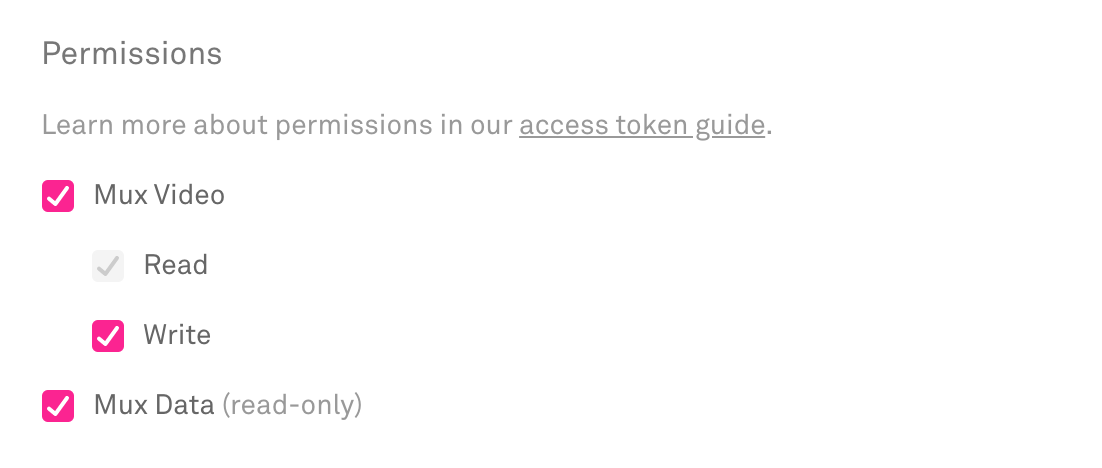
The access token should have Mux Video Read and Write permissions as well as Mux Data (read-only).
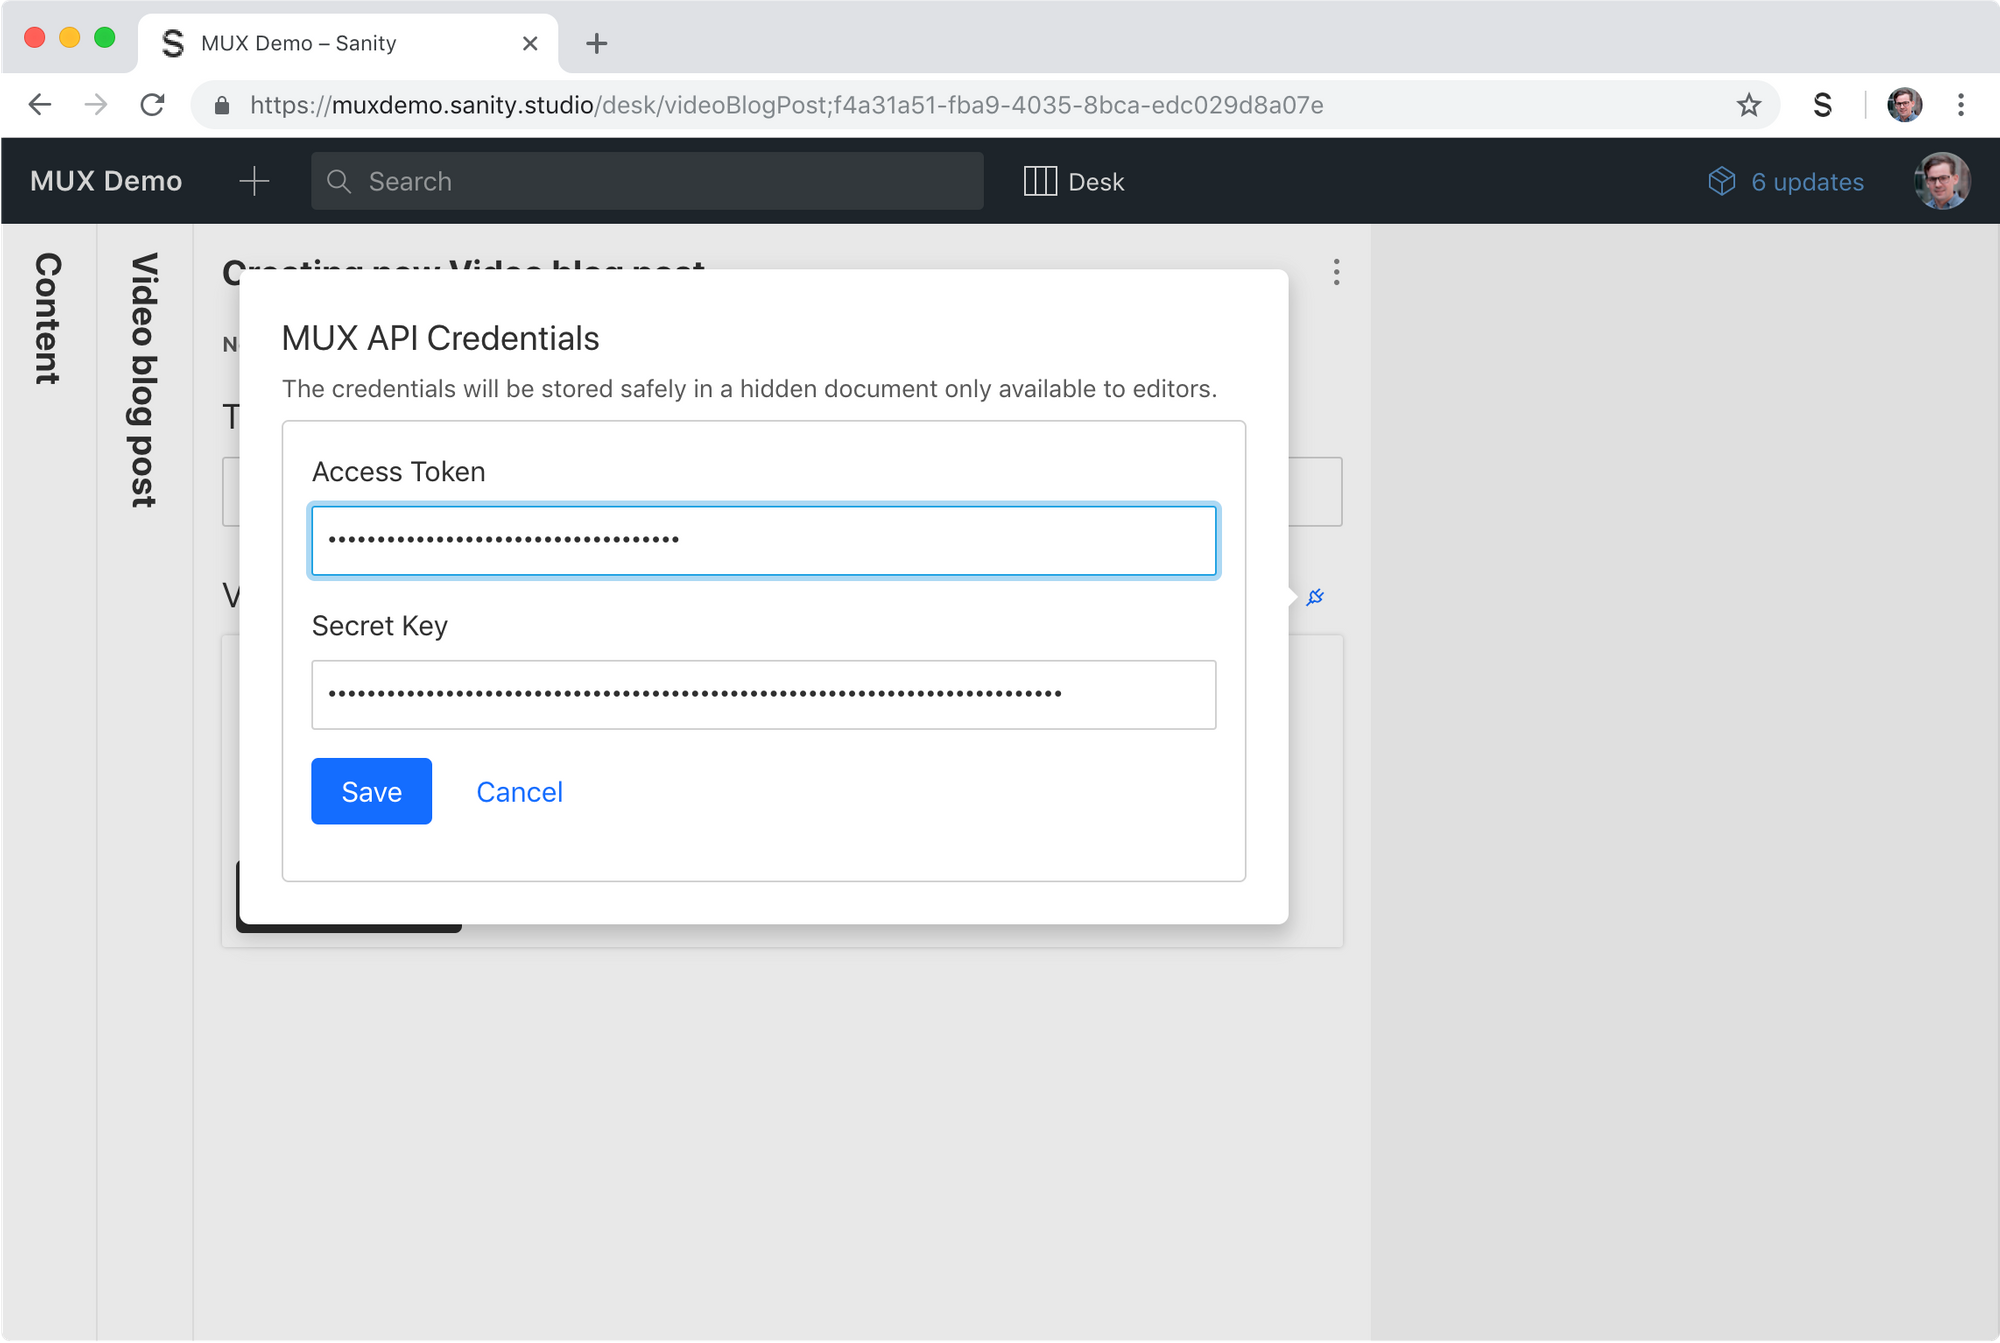
Back in Sanity Studio, find the document where your video field appears, and click the plug-icon 🔌 on the Paste your Token ID and Token Secret.
4. Upload video
Use the select button to open the file explorer on your system, drag the file right into the input area, or paste the URL to the video in the field. Once it's done uploading, you can select the thumbnail you want for the preview.
Congratulations!
You now have the ability to upload content to Mux through Sanity CMS!
To retrieve your video for playback, check out the Sanity docs for instructions.
5. Explore advanced options
Signed Tokens
Warning! Requires generating JWT on your server
Enabling signed URLs in Sanity will require you to generate your own signing tokens on your application server. This involves creating a signing key and using that to generate JSON web tokens when you want to access your videos and thumbnails outside of Sanity.
By default, all assets uploaded to Mux through Sanity will be created with a playback policy of "public". This means that your videos and thumbnails are accessible with https://stream.mux.com/{PLAYBACK_ID}.m3u8 and https://image.mux.com/{PLAYBACK_ID}/thumbnail.jpg.
If you want more control over delivery of the playback and thumbnail access, you can enable this feature on the Sanity configuration popover:
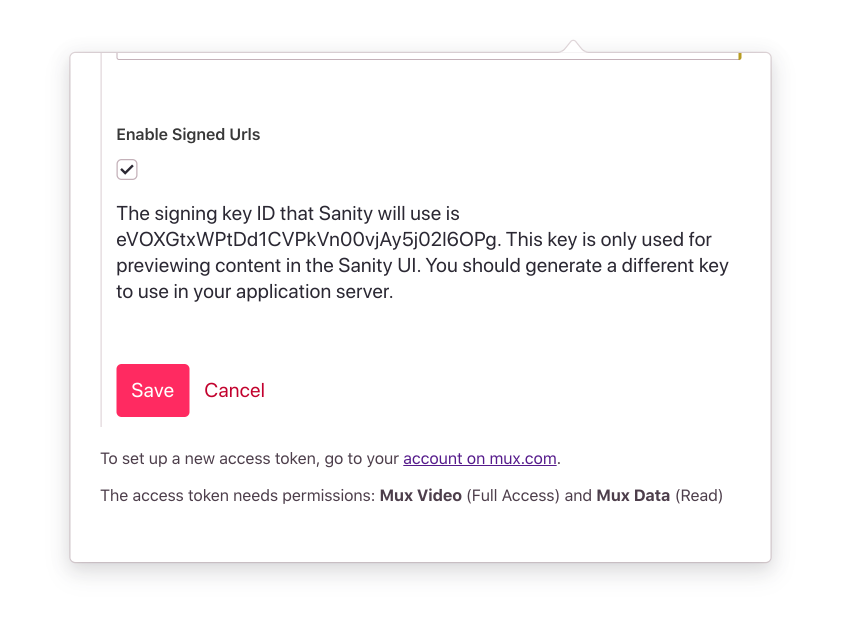
When you enable this feature, the following things will happen:
- The Mux Plugin in Sanity will use the Mux API to create a URL signing key and save this with your
secretsdocument. - Any assets that get created while this feature is enabled will be created with
playback_policy: "signed"(instead of"public"). - The signing key from Step 1 will be used by the Mux Plugin to preview content inside the Sanity UI.
- When you access your content in your own application, use the
MuxAsset.data.playback_idsproperty to determine if the asset has asignedorpublicpolicy.
{
  "_id": "0779365f-bbd1-46ab-9d78-c55feeb28faa",
  "_type": "mux.videoAsset",
  "assetId": "fNMFNYMq48EwgJM7AIn1rNldiFBcVIdK",
  "data": {
    "playback_ids": [
      {
        "id": "01cBJKm5KoeQii00YYGU7Rvpzvh6V01l4ZK",
        "policy": "public"
      }
    ]
  },
  "status": "ready"
}- You should use the signed
playbackIdto create URLs for playback and for thumbnail generation.
- Playback
https://stream.mux.com/{SIGNED_PLAYBACK_ID}.m3u8?token={TOKEN} - Thumbnails
https://image.mux.com/{SIGNED_PLAYBACK_ID}/thumbnail.jpg?token={TOKEN}
- The
TOKENparameter for the above URLs is something you create on your server according to Step 2 in Secure video playback
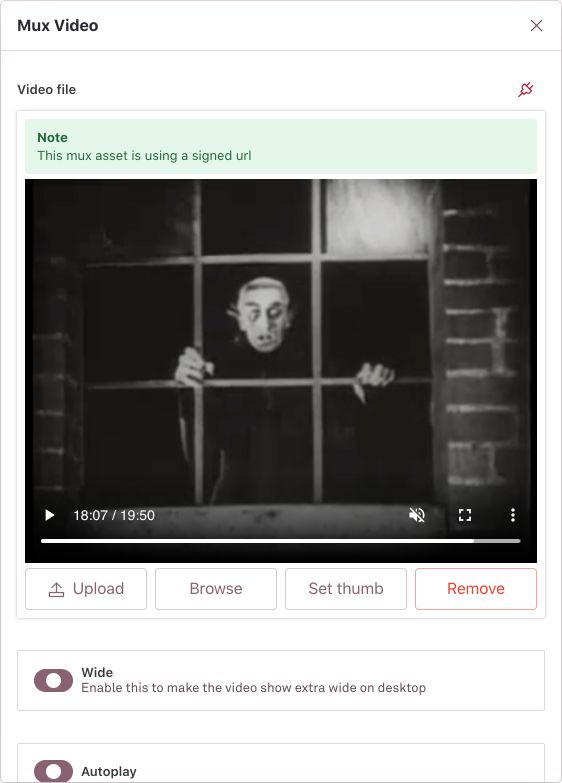
Note that in the Sanity UI when an asset is using a signed URL you will see this green notice.
Encoding Tiers
When uploading a new video, you can select which Encoding Tier is used when preparing the Asset. Possible selections are Smart and Baseline. When choosing Smart, additional options are made available for maximum resolutions (1080p, 2K or 4K).
More details can be found in our Use Encoding Tiers guide.
Static Renditions
When using the Smart Encoding Tier, an option to enable downloadable MP4s will be available. This option will create Static Renditions for the Asset and will make MP4 files available for download to client devices using a formatted URL.
Max Video Resolution
You can specify the maximum resolution to encode the uploaded video. This option is particularly important in managing costs when uploaded videos are higher than 1080p resolution and also allows you to encode and play videos in 2k or 4k resolutions.
More information on the feature is available in our docs. Also, read more on this feature announcement in our blog post.
Captions/Subtitles
With Mux's auto-generated captions, you can easily add captions to videos uploaded by selecting the language of the spoken words. When using this auto-generated option, Mux will generate captions automatically while it prepares the Asset. More details can be found in the Add auto-generated captions to your videos and use transcripts section of our documentation.
Warning! Auto-generate a single caption track
The "Auto-generated" captions configuration should only be used to generate a single language captions track. The language selected must match the spoken language.
Set up playback
Preview your video
Integrate Mux Data
Release notes
Current release
v2.3.0
- Added the ability to specify encoding tier setting on new uploads.
- Added the ability to specify static renditions when uploading a Baseline encoding tier Asset.
- Added the ability to specify maximum resolution to encode/process the uploaded video.
- Added the ability to auto-generate captions.